HOW TO USE THE LIFT AND LEARN 'POWER TOOLS' IN SIGNSTIX

The aim of the ‘power tools’ concept in Creator is to offer advanced functionality to all users via simple dialogs.

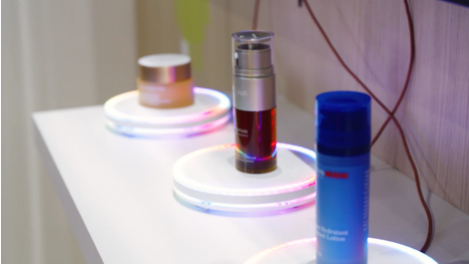
The Lift-and-Learn power tool allows users to create interactive experiences where the content on the screen changes whenever someone physically picks up a product.  All the detail about the product is displayed clearly on the screen, instead of the customer having to pore over the small-print on the packaging.

The end result tends to feel more natural and engaging than experiences that rely on pressing virtual buttons on a touchscreen.

A Lift-and-Learn experience works using one or more SignStix RFID pads connected to a SignStix Device.  A unique RFID tag (a special electronic label) is then attached to the base of each product involved in the experience.  This allows the SignStix device to detect when a product is lifted from a pad or placed onto it, and these events can trigger the changes in content.

Because the device is also told which tag corresponds to which product, it can tell which product has been lifted or placed and jump to the appropriate content for that product.

Please note:

  • The SignStix Player version on your SignStix device must be 3.3.3 or above to work with the Lift-and-Learn power tool.
  • Lift-and-Learn is only supported on M12S SignStix devices currently.
  • In the example below, it is assumed that you already have one or more SignStix RFID pads, together with a powered USB hub if you have two or more pads.
Lift and Learn

Lift and Learn Example

As an example, suppose that we want to build a Lift-and-Learn experience to promote a range of luxury chocolate boxes.  The requirements for the experience are as follows:

  • There will be 3 products in the range: Dark Delight, Milk Magic and White Wonder.
  • There will be 3 RFID pads, one for each chocolate box.
  • The initial content on the signage screen will be a beautiful attractor sign, inviting customers to come over and interact.
  • When someone picks up a box of chocolates, the signage screen will change to show pictures of all the chocolates in that box, together with enticing descriptions of how delicious they are.
  • When the user puts a box back onto the pad, the content will change back to the attractor sign.
  • If the user accidentally puts the box down somewhere else or wanders off with it, the content will change back to the attractor sign after a timeout of 50 seconds.

Using the Lift and Learn Power Tool

The experience in the example above can be defined in Creator as follows:

1. Create and publish one product sign for each of the 3 chocolate boxes.  These signs will include the pictures and descriptions of the chocolates.  Let’s call the signs ‘DarkSign’, ‘MilkSign’ and ‘WhiteSign’.
2. Create the attractor sign.  Let’s call it ‘ChocolateAttractor’.
3. Within the attractor sign, add a Lift-and-Learn power tool by clicking the Lift-and-Learn icon in the Tools section on left of Creator.
4. In the resulting dialog:
a) Set the ‘Number of items’ to 3, since we have 3 products.
b) Set the ‘Trigger type’ to ‘Item Lifted’.
i) This is because we want a product sign to be displayed when a product is lifted, not when it is placed.
ii (Choose ‘Item Placed’ if you’re creating a ‘Place-and-Learn’ experience.)
c) Set the ‘Timeout (secs)’ to 50 as required.
d) In the Items section, define the product names and the corresponding signs e.g.
i) Dark Delights  ->  DarkSign
ii) Milk Magic  ->  MilkSign
iii) White Wonder  ->  WhiteSign
e) Click ‘Add Lift & Learn’ to complete.
5. This will result in a new Lift-and-Learn layer in the Layers panel.  Note that the layer has no graphical presence in the sign, but you can click it in the Layers panel if you need to adjust any of the settings.
6. Publish the attractor sign.

Creating a Sequence

Now in SignStix Director, we create a new sequence which will contain all the content for the experience:

a) Create a new Sequence called e.g. ‘ChocolateLiftAndLearn’.
b) Add all four signs to the sequence, putting the ‘ChocolateAttractor’ sign first, and setting the repeat condition for all the signs to ‘Indefinitely’.
c) Deploy the ‘ChocolateLiftAndLearn’ sequence to your SignStix device.
d) You should see the ‘ChocolateAttractor’ on the signage screen.

Preparing the RFID Pads

In this section, we connect the RFID pads to the SignStix device and grant permission for the device to access the RFID pads.

  1. Connect a USB mouse to the SignStix device. – If a dialog pops up, you can just cancel it.
  2. Now connect one of the RFID pads to the SignStix device – Note that if you are using more than one pad, you will need to connect them via a powered USB hub.
  3. If a message appears along the lines of ‘Open SignStix Player when this USB device is connected?’ with a tick-box titled ‘Use by default for this USB device’, ensure that you tick the box and then click ‘OK’ – This is vital as it gives the SignStix device permission to access the RFID pad and, importantly, that permission will survive across reboots.
  4. Repeat for the other two RFID pads.
  5. Disconnect the USB mouse.
  6. As a test, power the SignStix device off/on – If the previous steps have succeeded then there should be no USB pop-up messages appearing when the ‘ChocolateAttractor‘ sign appears.

Assigning RFID Tags

Finally, we need to attach RFID tags to the chocolate boxes and tell the system which tag corresponds to which product.

To attach an RFID tag to the base of each chocolate box.  Position the tags centrally so that they will be directly over the pad when a product is placed.

Now you need to launch ‘Item Mode’.  This is a special mode that can only be started during the first 90 seconds after the SignStix device has been powered on.  This restriction is so that the general public cannot launch Item Mode during normal use (accidentally or otherwise)!

So when you’re ready, power the SignStix device off for a few seconds, then power it back on.  Once the ‘ChocolateAttractor’ sign has appeared, do the following:

  1. If there are any products on the pads currently, remove them from the pads to avoid confusion.
  2. Perform the ‘Item Mode Start Routine’ as follows:

a) Place one of the (tagged) chocolate boxes onto one of the RFID pads for 1 second then lift it off for 1 second.

b) Repeat 2 further times so that the box is lifted 3 times in total.

  1. If you are successful, you should see an orange-background page titled ‘Item Mode’.

a) Follow the on-screen instructions in Item Mode to assign tags to the products.

  1. If nothing happens, please try the ‘Item Mode Start Routine’ again, making sure you allow at least one second between each stage.

a) Also, keep an eye on the clock.  If more than 90 seconds have elapsed since the SignStix device was powered-on, you will need to power the device off/on then try again.

Please note:

  • Having completed Item Mode successfully, you should not need to run it again, unless one of the chocolate boxes is mislaid (or stolen) and you need to assign a new RFID tag to a replacement box.
  • The association between tags and products is stored directly on the SignStix device.  So you can deploy the same Lift-and-Learn experience to multiple locations, providing that you run Item Mode once at each location (since the chocolate boxes at one location will have different tags from the boxes at other locations).

Testing

When you have completed Item Mode successfully, the Lift-and-Learn experience will be ready to use!  Test it by putting all 3 chocolate boxes on the pads.  Then lift the boxes, one at a time, and check that the content changes to the appropriate sign for the box that was lifted.

Test that when you return a box to the pad, the content jumps back to the attractor sign.